FX Dedicated VPS / Client Portal
This page provides instructions on how to connect to your VPS via console from the client portal and operate it.
1. Purpose and Overview of This Manual #
The purpose of this manual is to guide you through connecting to your VPS via console from the client portal and operating it.
2. Revision History #
| Version | Creation Date | Updates |
|---|---|---|
| 1.0 | 2024/3 | Initial version created |
4. Prerequisites #
- Your device must have an internet connection
- Your network environment must be able to establish HTTPS connections to external servers
- Your device must have one of the following web browsers available: Chrome, Firefox, or Microsoft Edge
- You must be in a state where you can log in to our client portal
5. Opening the Server Details Screen #
Step 1 Open the target instance from the client portal #
- After logging into the client portal, click “Services” on the left side of the screen.
- Click the relevant service from the list of services you are using.
- When the list of VPS instances you are using is displayed, click the instance you want to operate to open the server details screen.

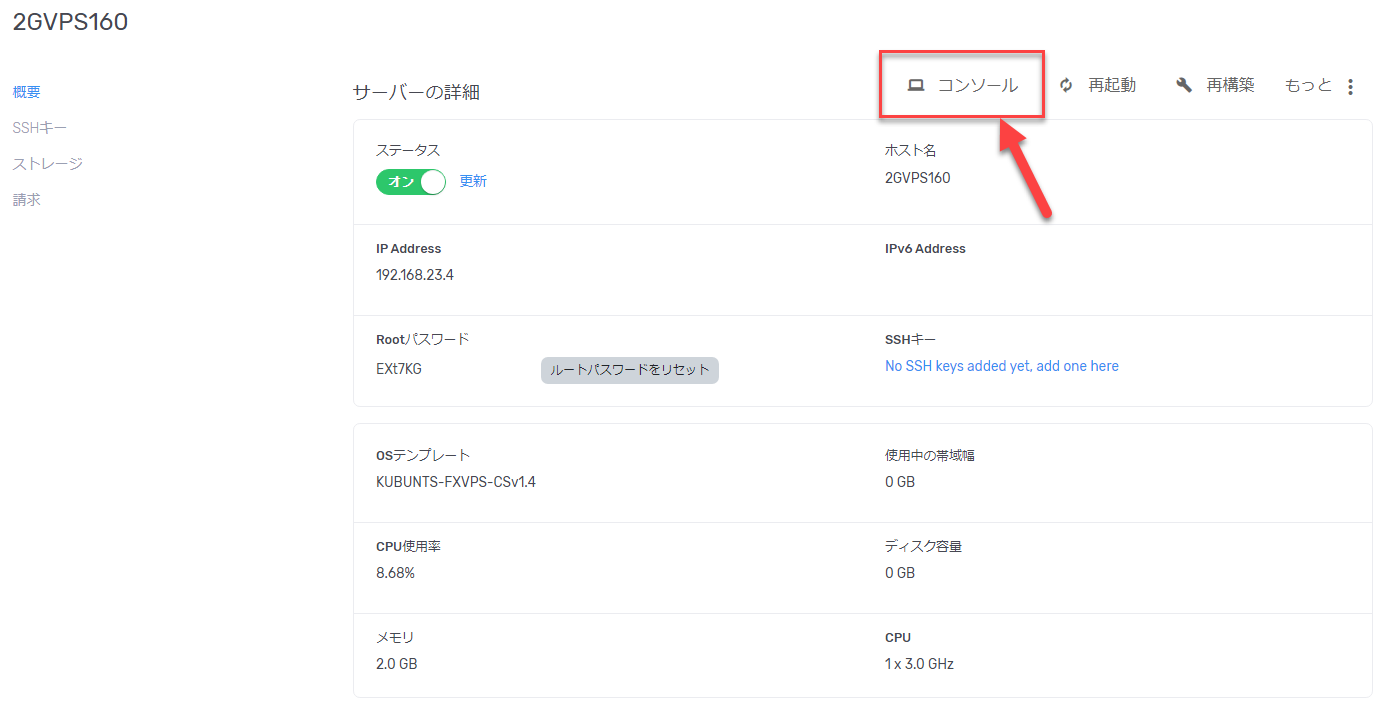
6. Click “Console” #
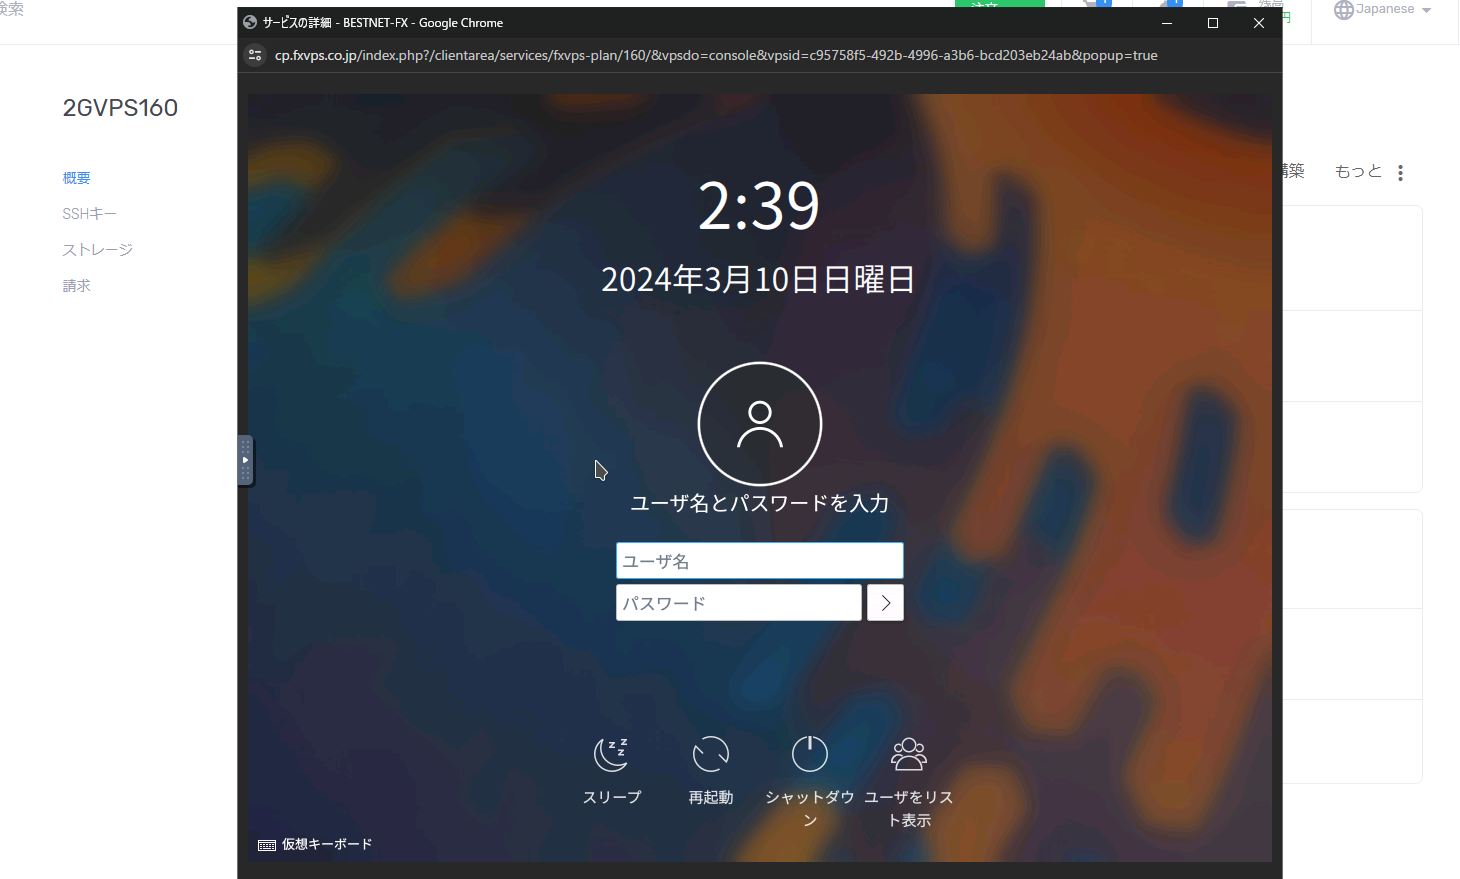
Step 2 Launch the console browser #
On the server details screen, click “Console” to display the console browser in a popup.
7. Text Pasting #
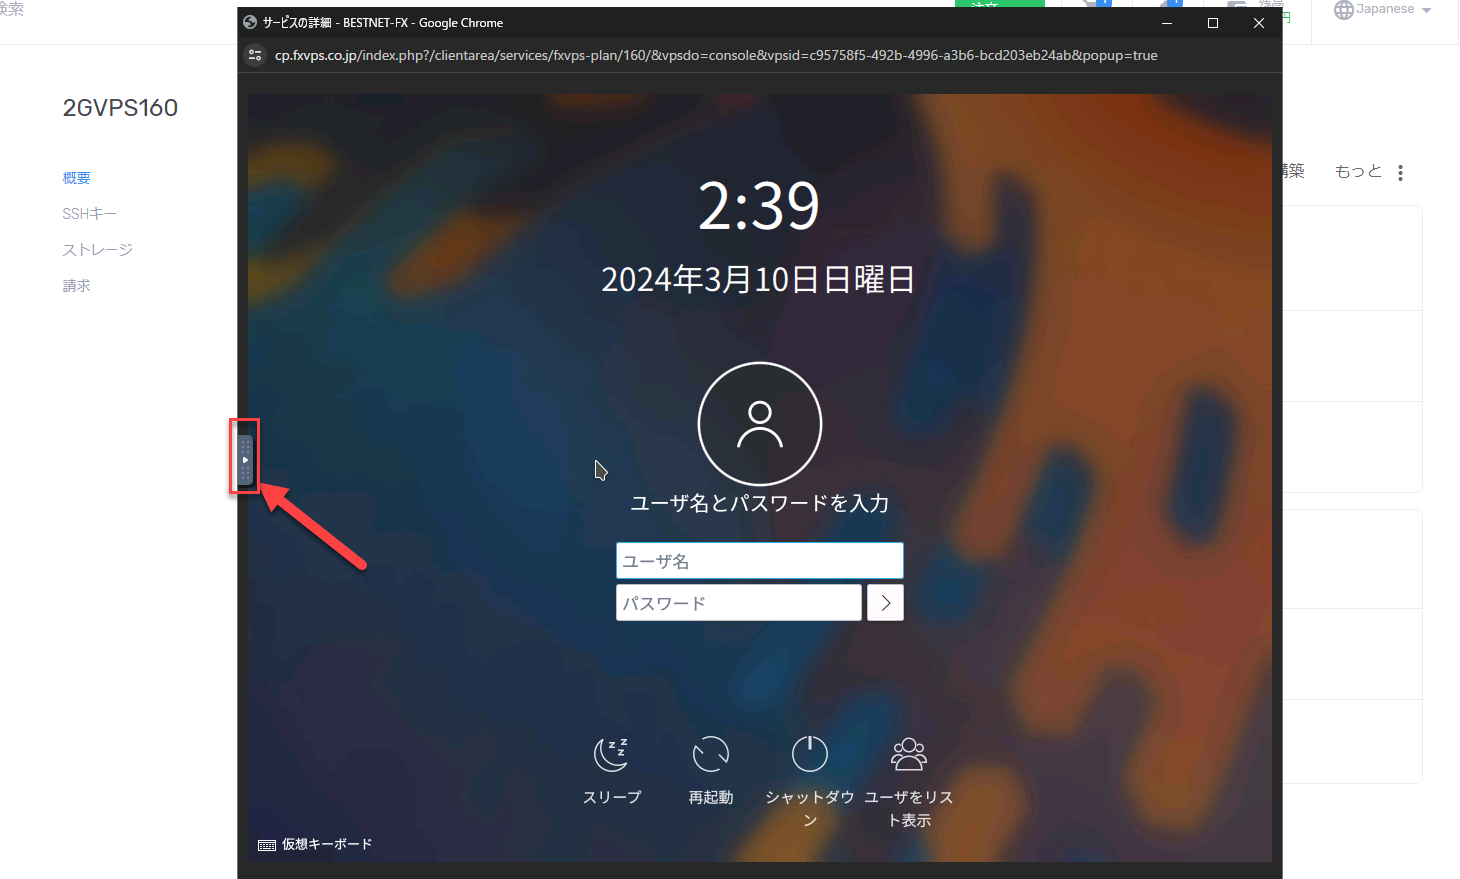
Step 3 Open the menu button #
You can paste text from your PC to the VPS via the console. First, click the menu button on the console screen.
Operation Tips
The menu button is located in the red-framed area in the image below.
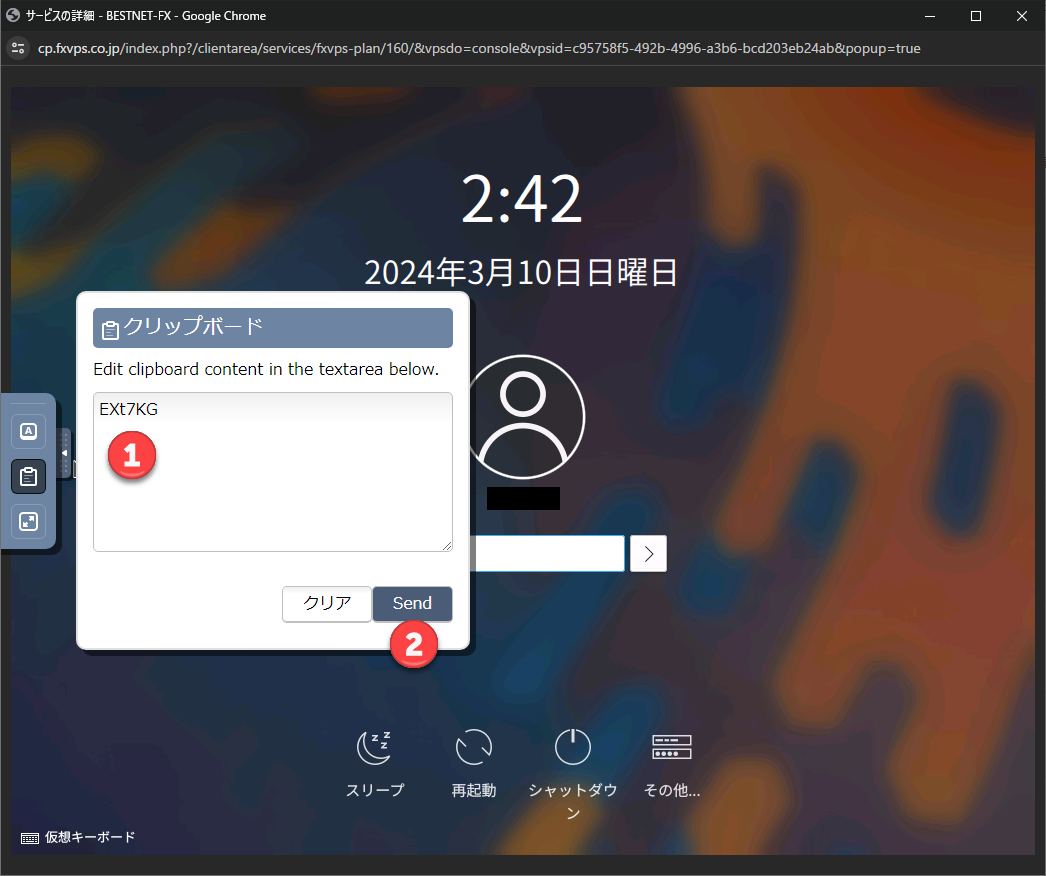
Step 4 Send from the console clipboard #
Referring to the image below, paste the text from the console clipboard.
- Enter the content you want to paste into the console clipboard.
- Press the “Send” button to paste it to the VPS side.