Client Portal Guide
A guide summarizing the operational procedures for “restore from backup (recovery)” and “backup schedule settings” that can be performed in the client portal.
Purpose #
This document summarizes the procedures for restore from backup (recovery) and backup schedule settings that can be performed in the client portal.
Prerequisites #
- You can log in to the client portal
- You can open the target VPS / VM (service) screen
- The backup you want to restore has already been created (it appears in the list)
Open the Target Service Screen #
- Log in to the client portal.
- Open Services from the left menu and select the target VPS / VM.
- On the service details screen, operate the storage-related tabs (Backup / Backup Schedule).
RestoreRestore from Backup (Recovery) #
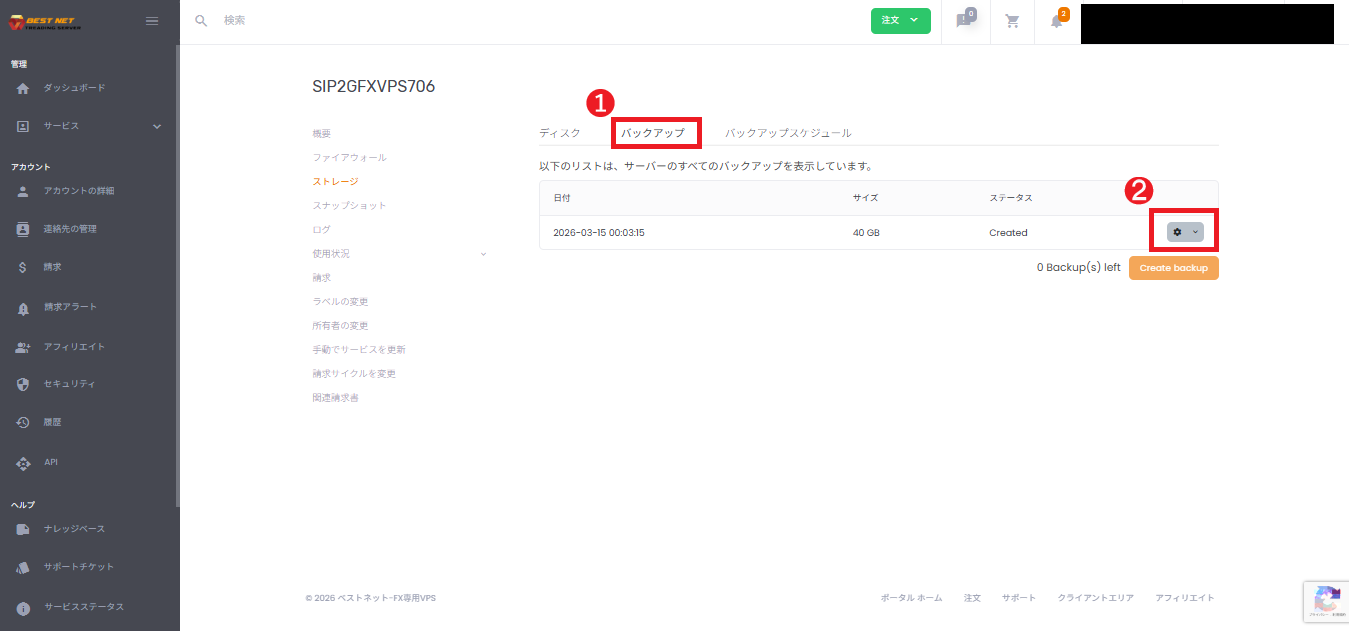
1. Open the Backup List #
- Open the Backup tab on the service details screen.
- Click the gear icon (action) on the right side of the backup row you want to restore.
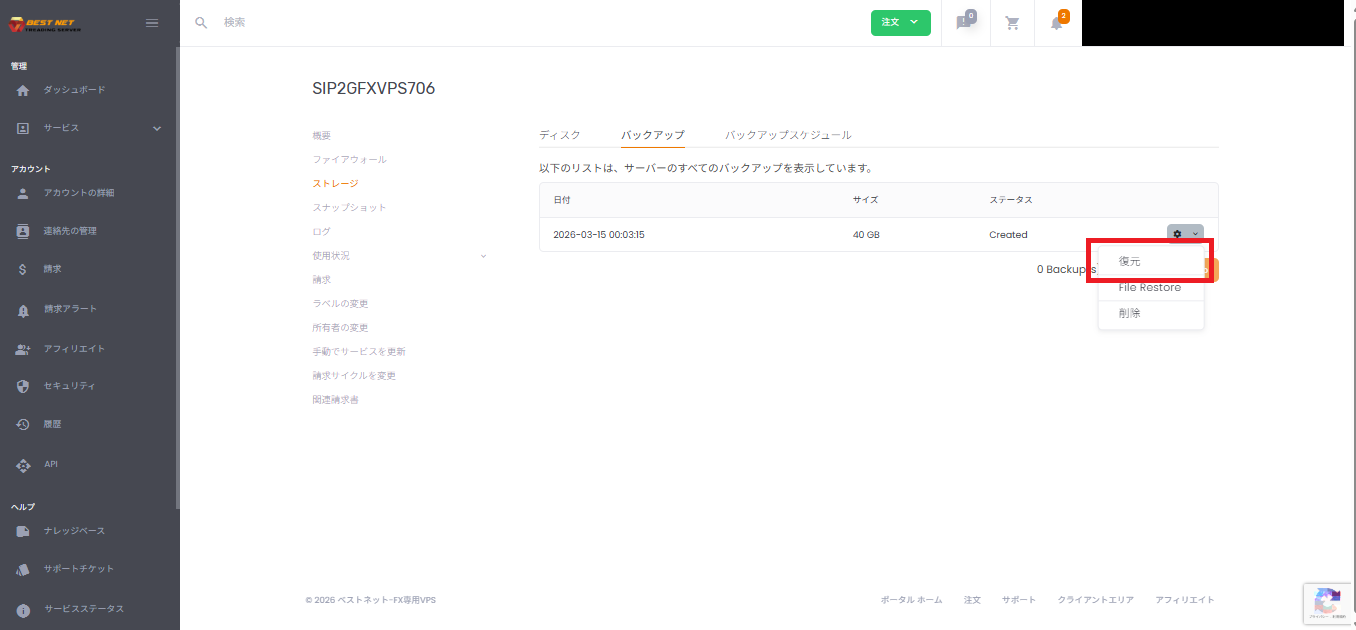
2. Execute “Restore” #
- Select Restore from the action menu.
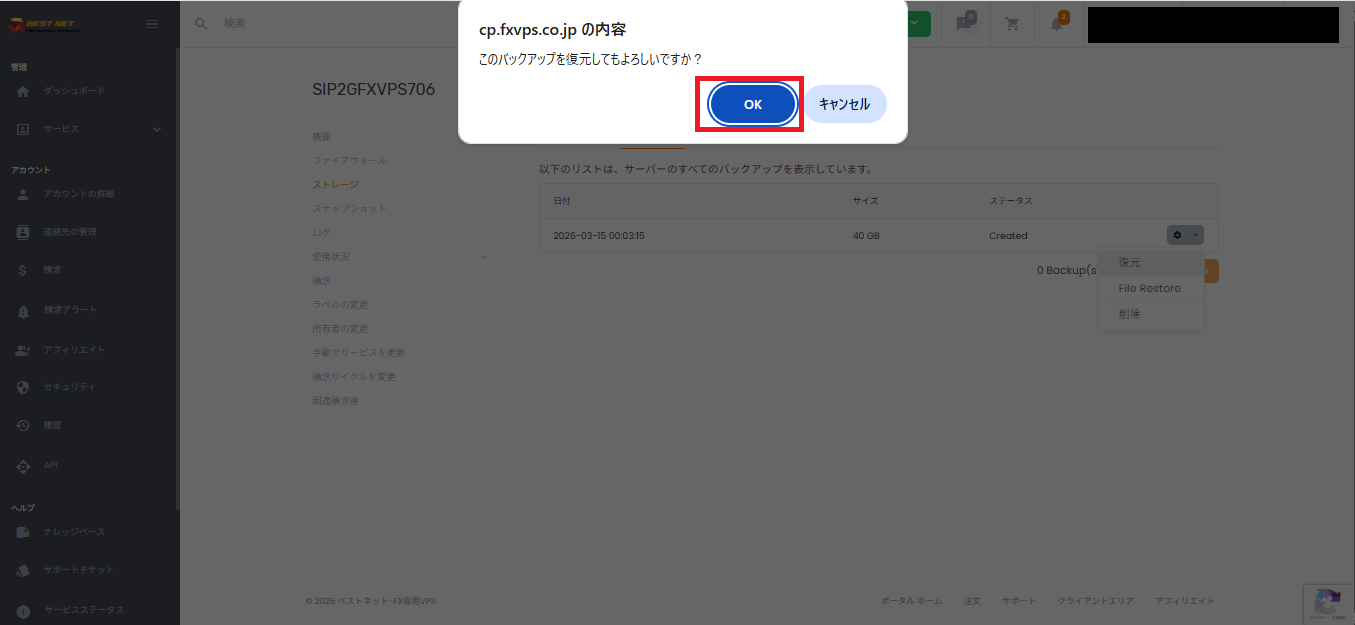
3. Click OK in the Confirmation Dialog #
- When “Are you sure you want to restore this backup?” is displayed, click OK.
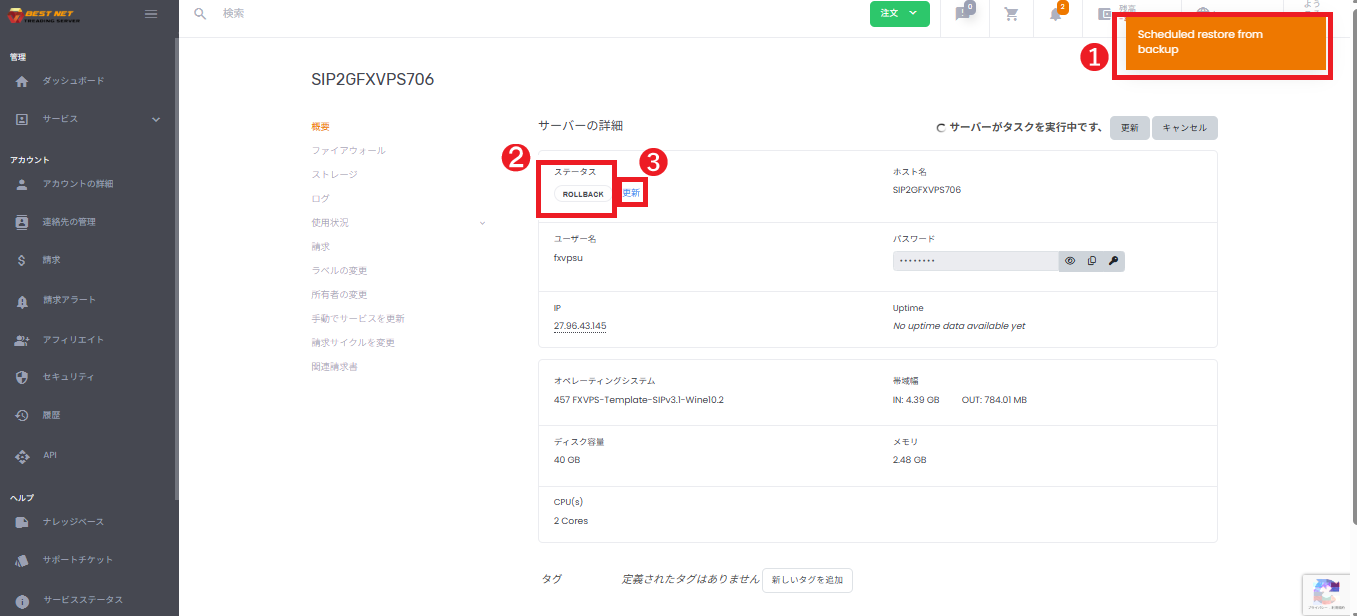
4. Confirm the Progress of the Restore (ROLLBACK) Process #
- When the restore is accepted, a notification such as “Scheduled restore from backup” is displayed in the upper right corner of the screen.
- The service details status becomes ROLLBACK, and “Server is executing a task” is displayed.
- Click Refresh as needed and wait until the process is complete.
Caution: “Restore” returns the server disk state to the point in time of the backup, so any changes made after the restore will be lost. Please confirm the scope of impact before executing.
File RestoreRetrieve Files from Backup #
If you want to download files / directories from a backup rather than restore the entire backup, use File Restore.
On the screen, the workflow involves downloading as a zip file with “Download as”.
1. Open File Restore #
- Click the gear icon (action) for the target backup in the Backup tab.
- Select File Restore from the menu.
2. Select the Path You Want to Retrieve and Download with “Download as” #
- Select the directory / file you want to retrieve from the displayed tree (example:
/var). - Click Download as in the lower right corner of the screen to start the download (zip).
- Follow your browser’s download / save dialog to save the file.
If you don’t want to restore the entire server, it is recommended to first use File Restore to check if you can extract only the necessary files.
SettingsBackup Schedule Settings #
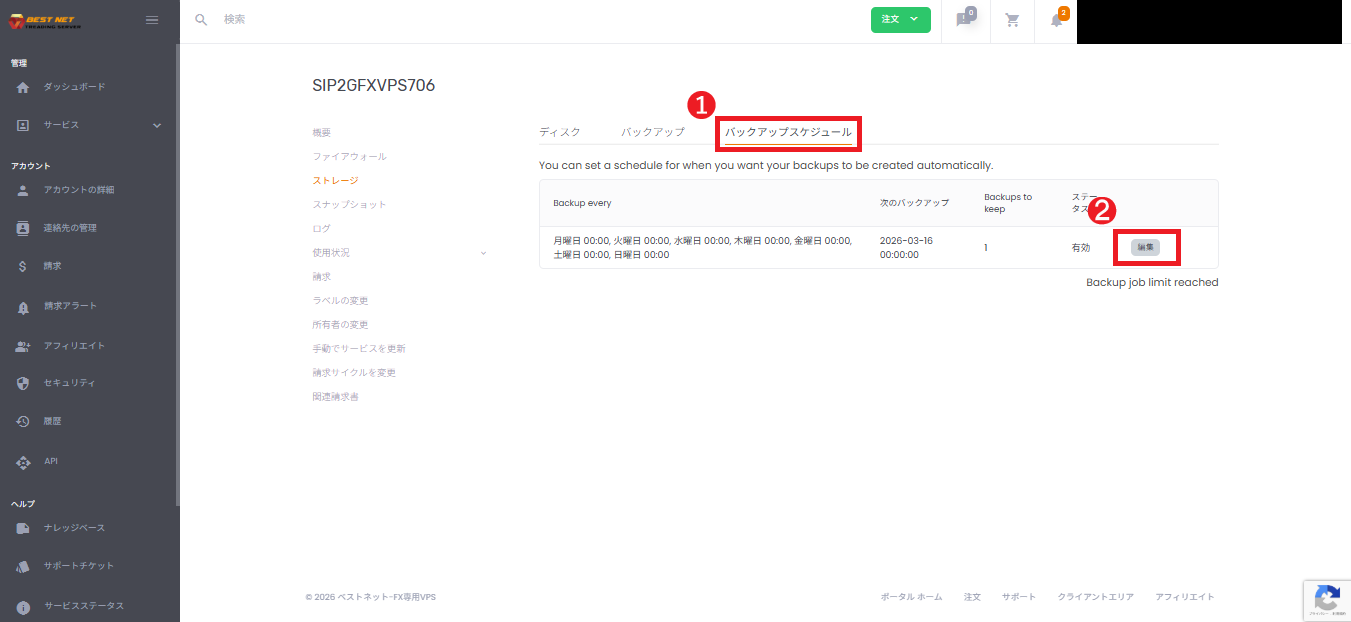
1. Open the Backup Schedule Screen #
- Open the Backup Schedule tab on the service details screen.
- Click Edit on the right side of the schedule list.
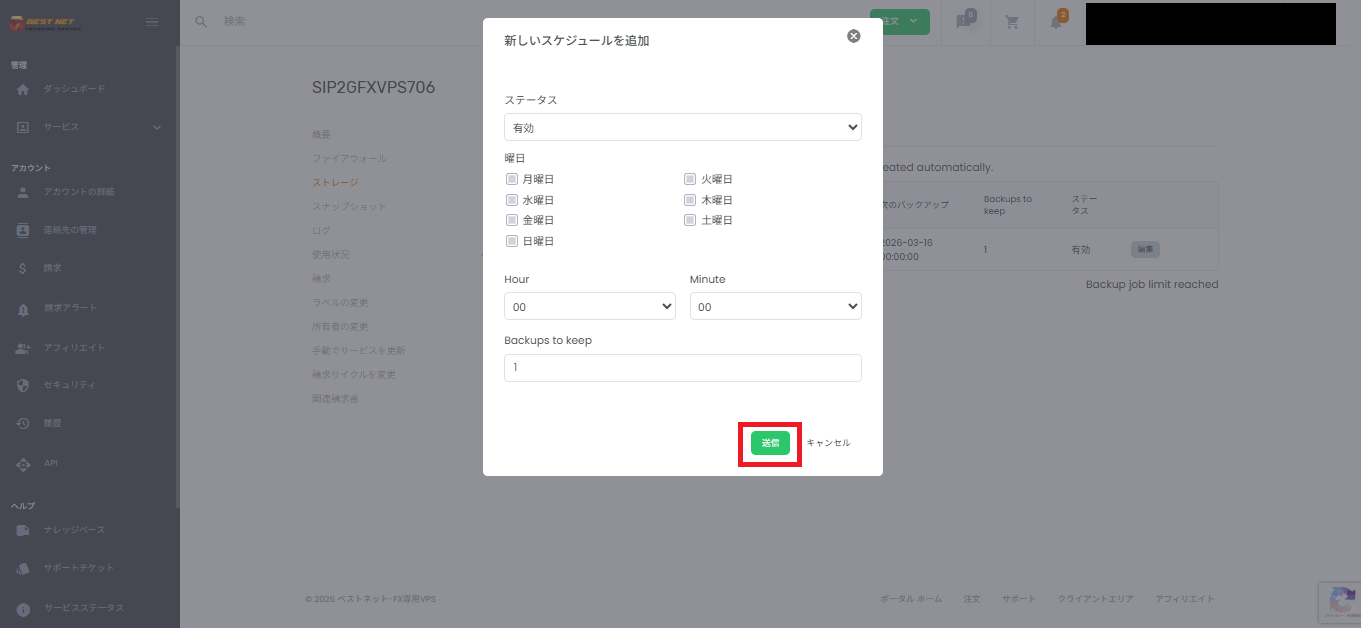
2. Enter the Schedule Details #
In the edit screen (modal), configure the following:
Configuration Items #
- Status: Enabled / Disabled
- Day of Week: Days of the week to run automatic backups (multiple selections available)
- Hour / Minute: Time of execution
- Backups to keep: Number of backups to retain
Notes #
The actual deletion timing and retention behavior may vary depending on the environment. Please confirm in accordance with your operational policy.
3. Save with “Submit” #
- When configuration is complete, click Submit.
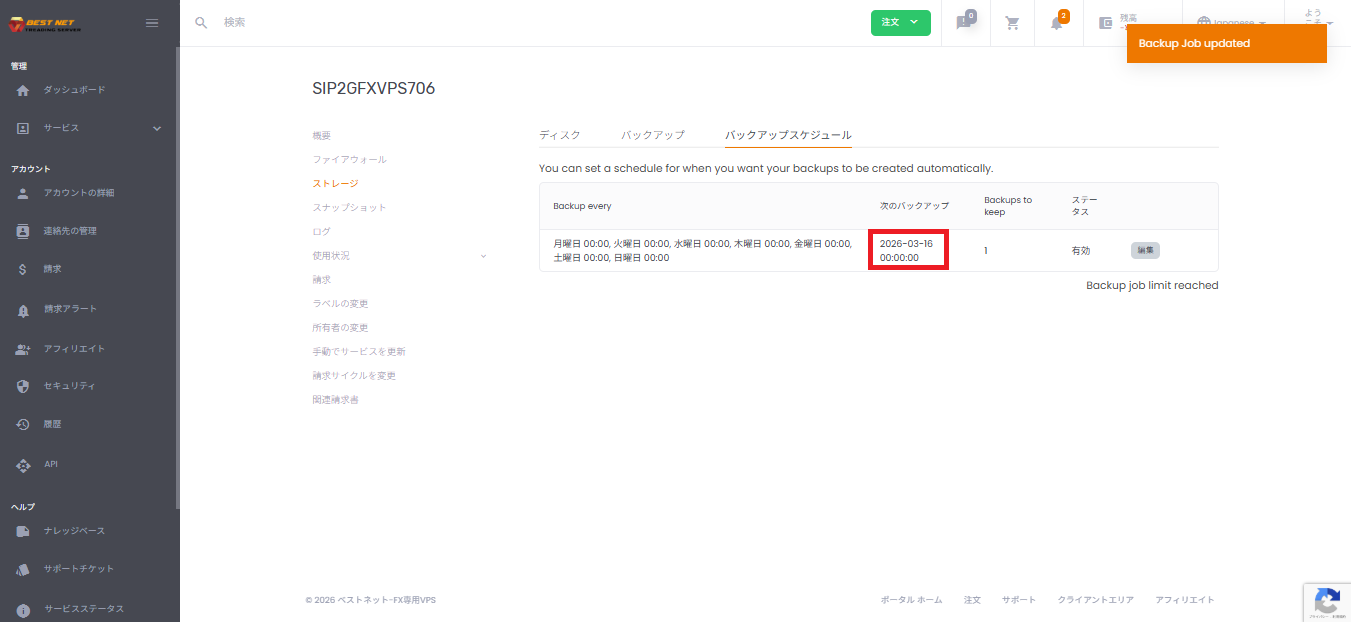
4. Confirm the Changes Are Applied #
- A notification such as “Backup Job updated” is displayed.
- Confirm that the Next Backup in the list is the intended date and time.
Notes and Common Displays #
When “Backup job limit reached” is Displayed #
You may have reached the limit on backup jobs due to your contract plan or server-side restrictions.
Consider deleting existing backups or contacting support.
When a Processing Message Appears Immediately After a Restore or Backup Creation #
“Server is executing a task” may be displayed.
If the status does not change, click Refresh to confirm the progress.


