Client Portal Configuration Guide
Security Configuration Procedure #
This guide outlines the procedures for configuring security-related settings in the client portal (multi-factor authentication, authorized IP access).
Prerequisites #
- An account that can log in to the client portal
-
To set up multi-factor authentication, one of the following:
- Smartphone (authentication app such as Google Authenticator / Authy)
- Access to a registered email address (if using Email MFA)
Open the Security Settings Screen #
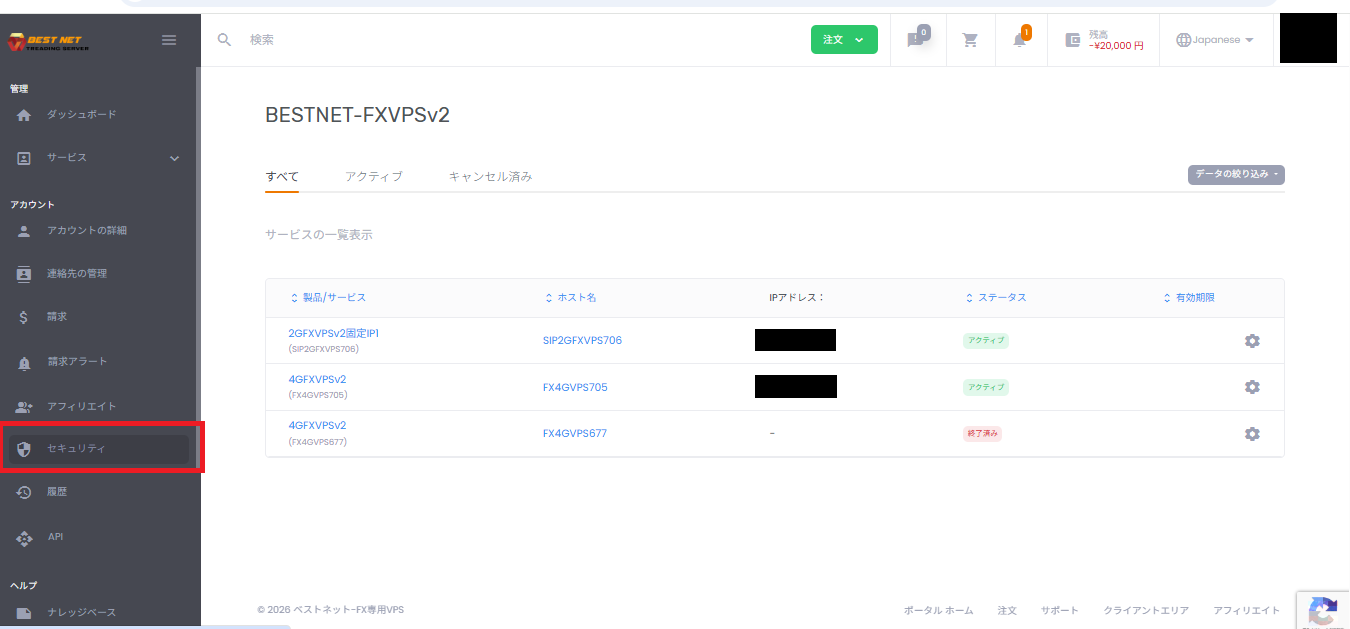
- Log in to the client portal.
- Click Security from the left menu.
Configure Multi-Factor Authentication #
Select Multi-Factor Authentication from the tabs at the top of the Security screen.
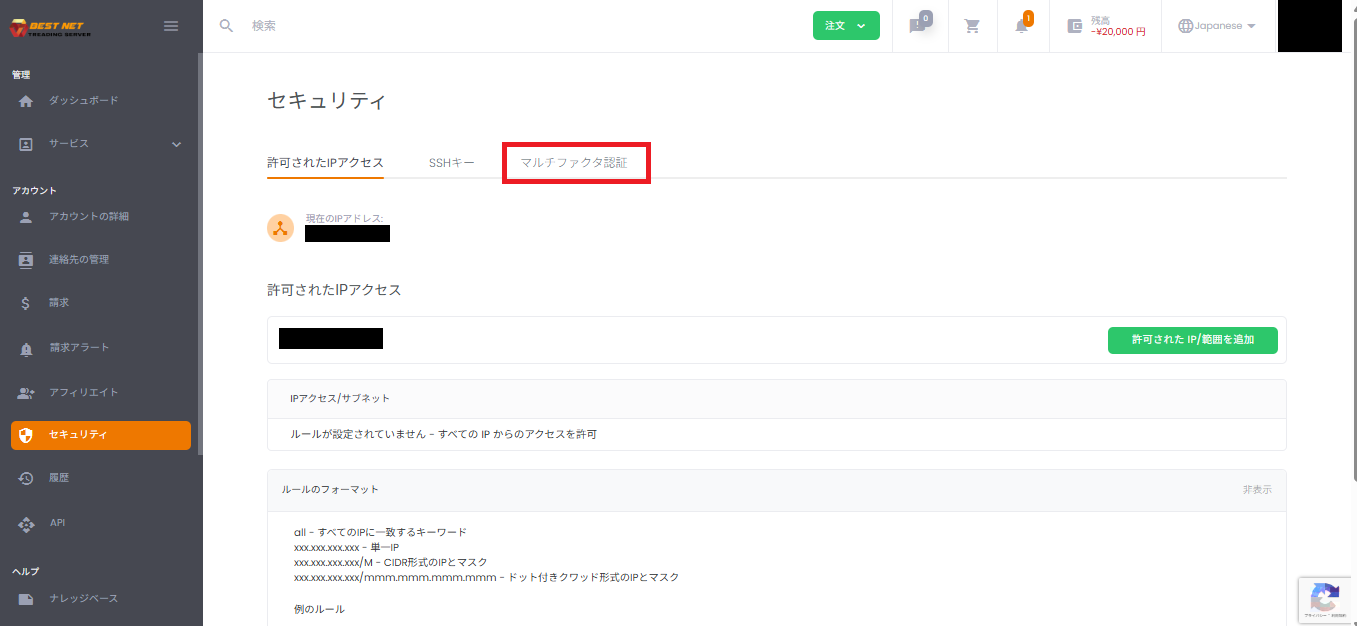
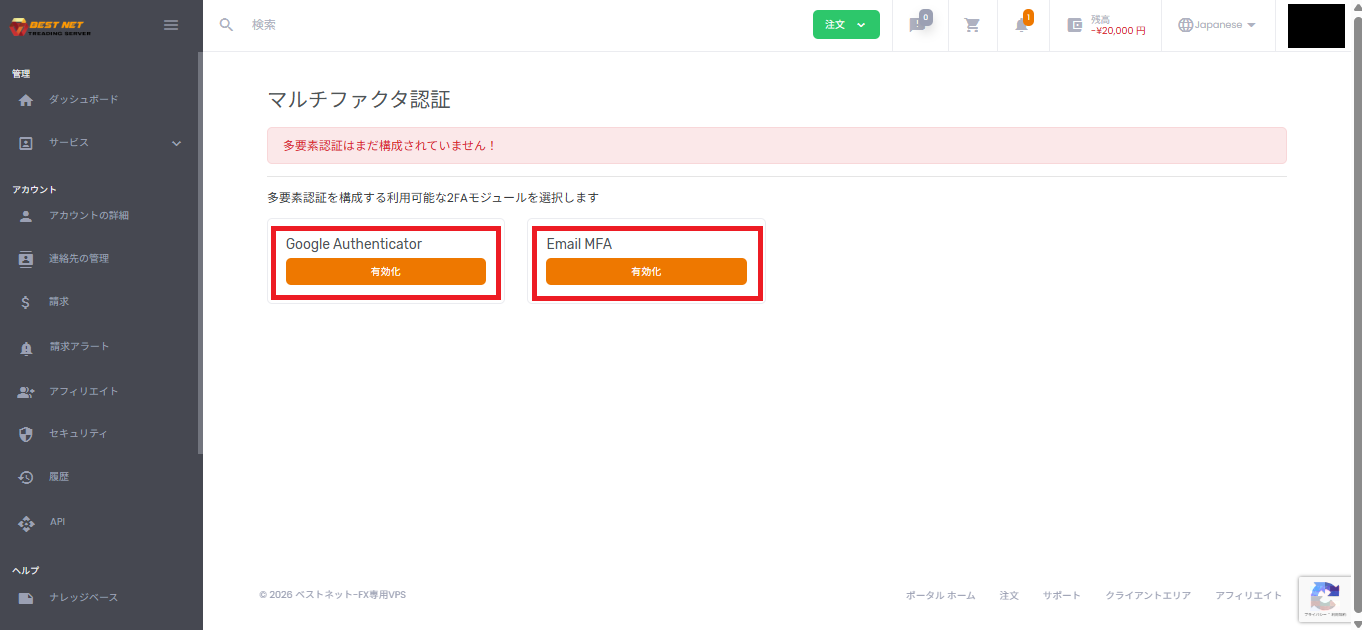
On the Multi-Factor Authentication screen, available methods (e.g., Google Authenticator / Email MFA) will be displayed.
Enable Google Authenticator #
- Click Enable in the Google Authenticator section.
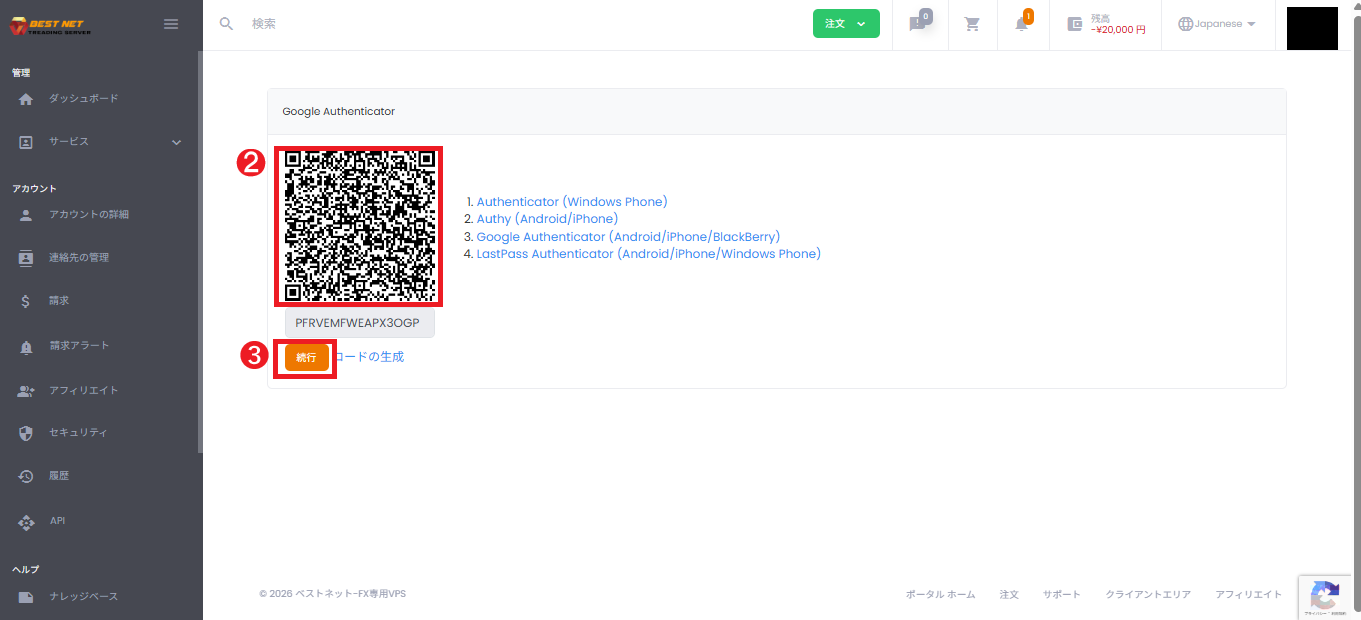
- Scan the displayed QR code with your authentication app (or manually enter the secret key).
- Click Continue on the screen.
- If a confirmation code entry screen appears, enter the one-time code displayed in your authentication app and complete the process (follow the on-screen instructions).
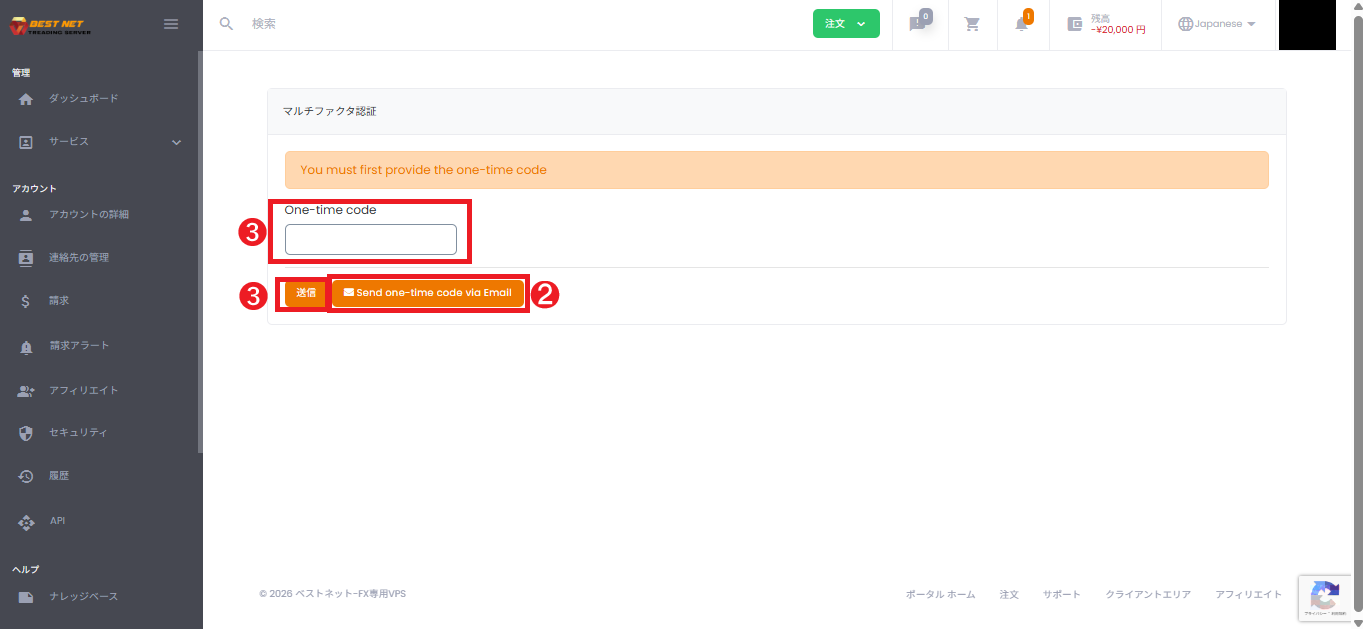
Enable Email MFA #
- Click Enable in the Email MFA section.
- Click Send one-time code via Email (or resend) to receive a confirmation code via email.
- Enter the confirmation code received in the One-time code field and click Submit.
Configure Authorized IP Access (IP Restriction) #
Authorized IP Access is a feature that restricts login to specific source IP addresses (or ranges).
It is effective when the access source can be limited, such as a corporate fixed-line connection.
Add Authorized IP/Range #
- Open the Authorized IP Access tab on the Security screen.
- Enter the IP (or range) you want to authorize in the input field.
- Click Add Authorized IP/Range.
- Verify that the rule has been added to the list.
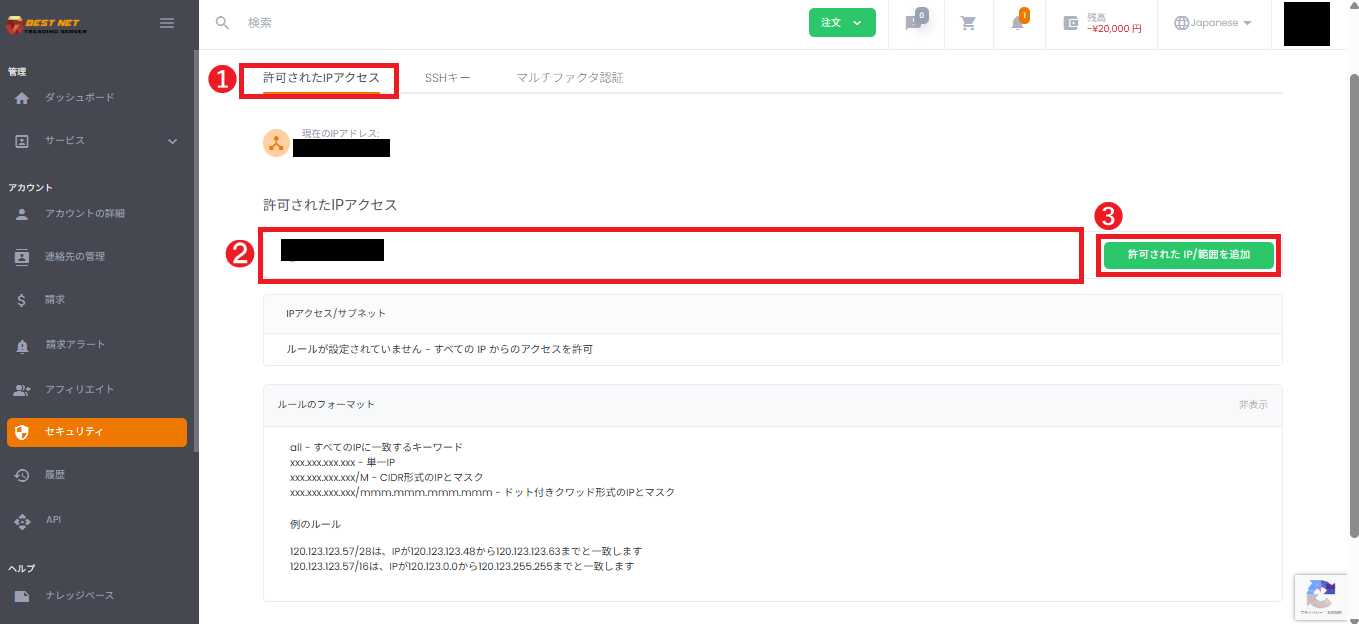
Important: Always Authorize Your Current IP #
Important Notice
If you configure authorized IPs and your current IP address is not included in the allowlist, you may be unable to log in in the future.
Your current IP address will be displayed on the screen. Be sure to verify that the IP(s) you use for operations (fixed-line, VPN exit IP, etc.) are authorized.
Rule Format (Input Examples) #
Enter according to the format examples displayed on the screen (representative examples).
all: Matches all IPs (no restriction)xxx.xxx.xxx.xxx: Single IPxxx.xxx.xxx.xxx/m: CIDR format (example: 203.0.113.10/32)xxx.xxx.xxx.xxx/mmm.mmm.mmm.mmm: Dotted quad format IP and mask
Verify Configuration Changes in History #
After performing operations, you can verify logs and sent emails from the portal’s History section.
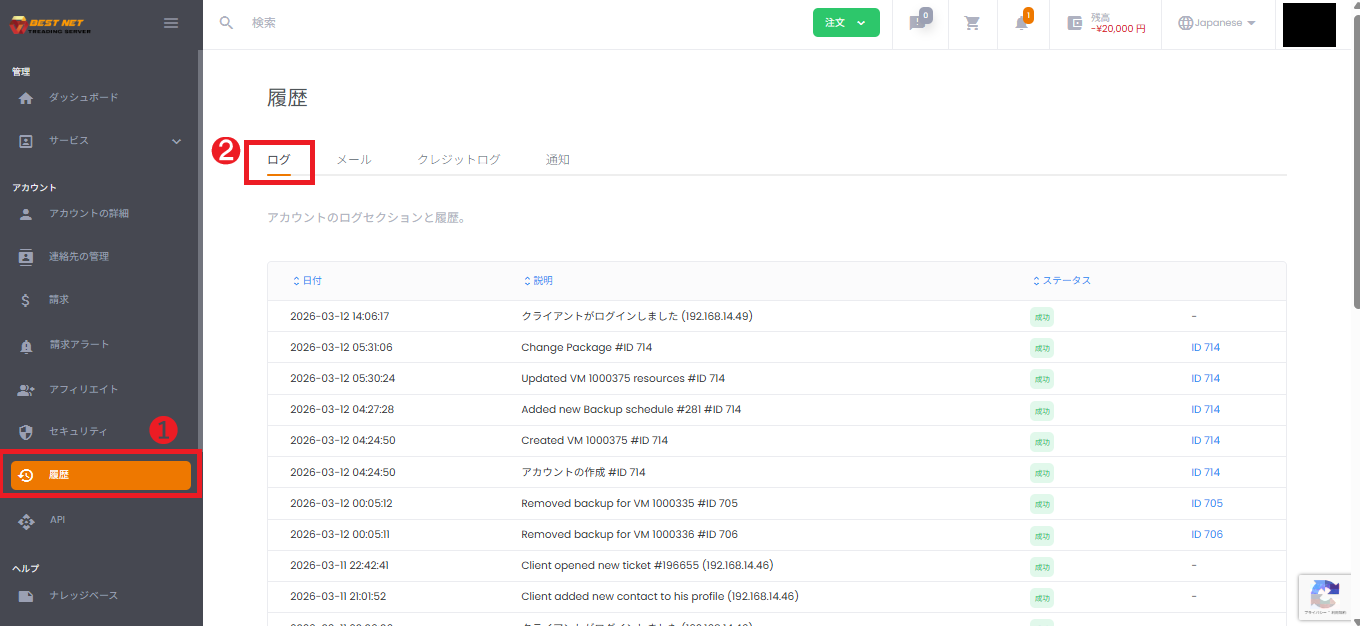
View Logs (Operation History) #
- Click History in the left menu.
- Open the Log tab at the top.
- Verify that security-related operations such as IP restriction additions and deletions are recorded.
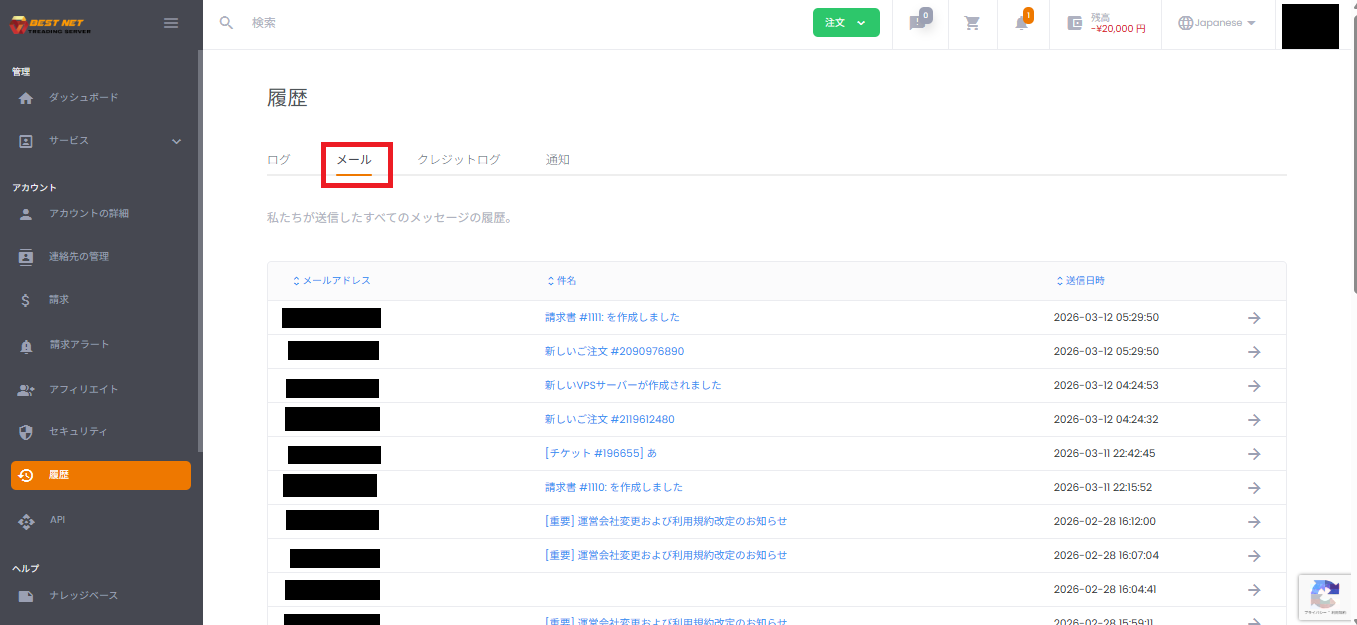
View Email (Sent Email History) #
- Open the Email tab at the top of the History screen.
- Verify that emails such as Email MFA confirmation codes (subject: Confirmation Code) have been sent.
Troubleshooting #
5.1 Unable to Log In After Setting IP Restrictions #
- Verify that your current global IP (fixed-line/VPN exit IP) is included in the allowlist.
- If you are logged in, you can delete the relevant rule from the trash icon.
- If you cannot log in, contact your administrator or support to request removal of IP restrictions.
5.2 Email MFA Confirmation Code Not Received #
- Check your spam folder.
- Use Send one-time code via Email (resend).
- Verify that the registered email address is up to date (account information).


